
Rancilio Silvia (Pre-2006) Repair
Repairing domestic espresso machines is an activity that can be separated into 5 distinct phases:
Diagnosis
Disassembly
Repair
Testing
Reassembly
Diagnosing the initial problem can be something of an art, but the block diagram should help with some of the basic problems. Once the diagnosis is reasonably certain, the disassembly phase can begin.

At this point it's wise to note that certain machines (mostly thermoblock machines made in China) are designed NOT to be disassembled by the layman.
If there are special screws or bolts, if the fasteners are concealed, if the body is glued or clipped together with internal fasteners, it's fairly certain that the manufacturer doesn't want you poking around inside. These machines usually come with "replacement" warranties, i.e. you send them back to the manufacturer and they ship you a new one and scrap the dud.
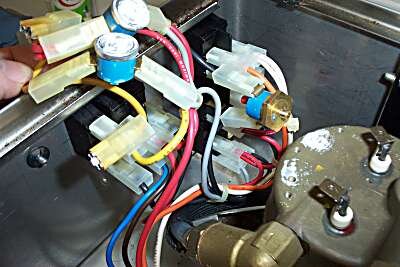
One important rule with all repairs concerns the electronic connections, particularly those for the various electronic bits like switches, thermostats, solenoids etc. NEVER LEAVE THEM DISCONNECTED. If you have to take the wires off to remove the thermostat, reconnect them to the thermostat as soon as it's removed. Any time that a wire will be disconnected for longer than a couple of seconds, TAKE A PHOTO so you know exactly where and how it reconnects.
Plumbing connections tend to more forgiving (there's usually only one way to connect them) but Teflon tape, thread sealant and high temperature silicone gasket sealant are proven methods for preventing inconvenient leaks.
IMPORTANT DISCLAIMER!!! ANY REPAIR WORK ON MACHINES SHOULD ONLY BE CARRIED OUT WITH THE MACHINE DISCONNECTED FROM ELECTRICAL POWER AND THE BOILER COLD.
IF YOU IGNORE THIS AND DAMAGE YOURSELF, DON'T COMPLAIN TO ME; YOU'VE BEEN WARNED!
Rancilio Silvia Repair
The first thing you need is a reasonably comprehensive tool kit. Note that (apart from the "weird bits" set) there are no really specialised tools involved, just metric spanners, metric sockets, screwdrivers, pliers, wrenches and a hammer.

GENERAL MACHINE ACCESS
UNPLUG THE MACHINE!
Remove the water tank and unscrew the 4 screws. Remove the top pane

Undo the 2 small screws (fine pointed phillips head screwdriver needed.)

Looking down into the tank area, a screw is visible in the cutout slot.
Unscrew this a couple of turns, then slide off the rear panel.

Undo the 2 screws and washers (DO NOT LOSE THE WASHERS) and remove the interior panel.
BOILER REPLACEMENT
When to do it? When your boiler either won't heat up, or you're getting circuit breaker trips due to current leakage. Element continuity can be checked with a multi meter; if there's no continuity, you need a new boiler. A leak around the base of the boiler (perished boiler o-ring) can be fixed using the same basic steps.
Parts Needed:
New Boiler
Boiler O-Ring
Spacer Washers
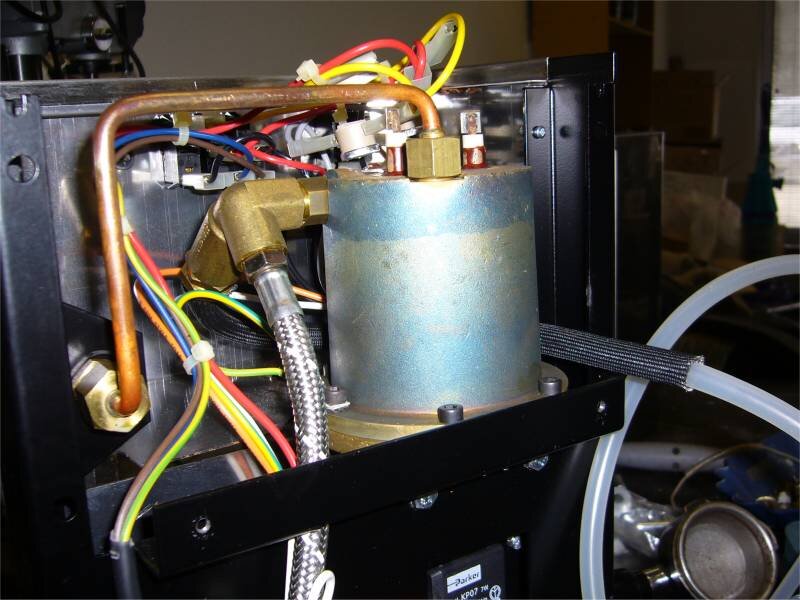
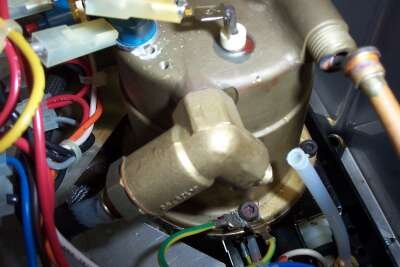
In machines purchased after 2006, the boiler, pump to boiler hose and boiler to steam valve pipe look like this. Except not so obviously blued by overheating. Replacement boilers are now all this model.
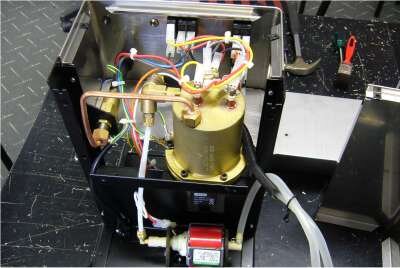
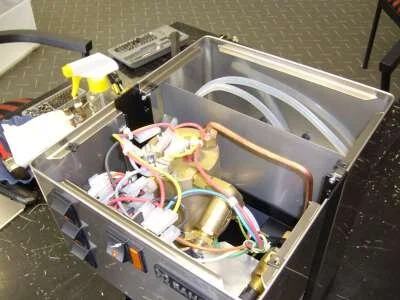
You now have complete access to the innards of your machine.
This is the latest Silvia, the rest of the photos are of the older model, which most people have.
Begin by removing the thermostats and element leads.
The overtemperature (red button) thermostat unscrews out of the body of the boiler.

Then undo the steam pipe nut (18mm) where it attaches to the boiler.

Next is the 12mm compression nut which attaches the teflon pipe from the pump to the boiler.
MAJOR TIP: When pulling or pushing teflon tube, use a piece of fine sandpaper or a scotchbrite pad for grip.
Pull the tube off the nipple then undo the hex bolts from the boiler.
The longest bolt (with washer) is the one the earth wires attach to.

In a sink or tray, knock the boiler loose with a sharp tap with a hammer, then pull it straight up.
Clean up the base, remove and discard the old o-ring, insert a new o-ring in the groove.
Note that all the crap in the base is a consequence of boiler overheating.
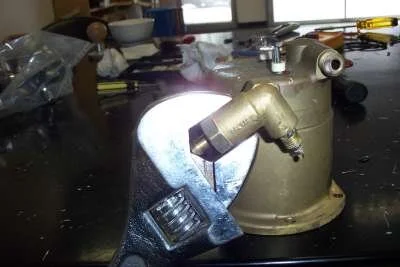
Remove the overpressure valve (OPV) hose from the old boiler (don't lose the spring clip).
Give the bolt (left hand) end of the valve (NOT the barb) a sharp downwards tap with the hammer, then unscrew the OPV.

Now comes the most difficult part of the whole process.
Inside the OPV there may be a copper compression spacer washer or two, or three.
Even if there isn't, you might need a combo of thick and thin washers to get the OPV tight, in the correct position, on the new boiler.

MAJOR TIP: Play with various washer combinations until you can screw the valve up TIGHT in the correct position.
Once the washers are right, I anoint the threads with pipe sealant, then use 10cm of teflon tape on top of the sealant.

Then it's a matter of screwing on the OPV until it's good and tight in the correct position, an upside down V.
Doesn't have to be exact, but if anything the right hand side should be a fraction lower than the picture.

Before reassembling I run a bead of high temperature silicone gasket sealant around the edge of the boiler as "insurance" against leaks.
Attach the OPV hose before putting the boiler back into the machine.

Finally, I trim 5mm off the end of the teflon pipe before pushing it back onto the nipple (you can only do it once), then reassemble everything in the order I removed it.
Make sure all the boiler hex bolts are good and tight.
MAJOR TIP: DO NOT OVERTIGHTEN THE OVERTEMPERATURE THERMOSTAT OR THE TOP THERMOSTATS' BRACKET SCREWS.
Otherwise they'll break off in the boiler body and you'll be in all sorts of trouble. As tight as you can get with 2 fingers on the screwdriver or socket is enough.
MAJOR TIP: TEST THE MACHINE FOR LEAKS ETC. BEFORE PUTTING THE PANELS BACK. IT'S MUCH EASIER TO FIX STUFF AT THIS STAGE.

Remove the steam valve knob by pulling it out from the machine.

Undo the steam wand nut (18mm spanner) and remove the wand by pulling it down. The o-ring may be on the end.

Undo the connecting nut (17mm socket). If the o-ring wasn't on the end of the wand, it will still be inside this nut. Remove it.

Undo the boiler connecting pipe (18mm spanner) then the locknut. Remove the steam valve from the machine.
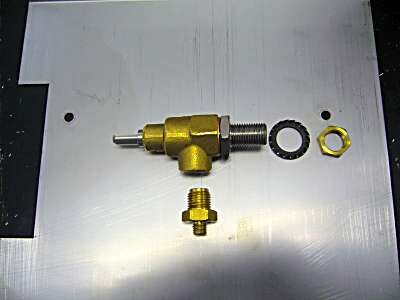
You now have to undo the stainless steel bit from the brass part of the valve. I find it easiest to lock the brass bit in a vice first.

The shaft can then be screwed out and the o-rings & washer replaced. Note that the washer is held on by a little bolt.
Reassemble and replace everything in the order you removed it.
MAJOR TIPS:
Screw the shaft out as far as possible before tightening the stainless steel bit as much as possible.
Put the o-ring on the end of the steam wand before pushing it into the connecting nut.
Tighten the brass locknut as much as possible before doing up the steam pipe.
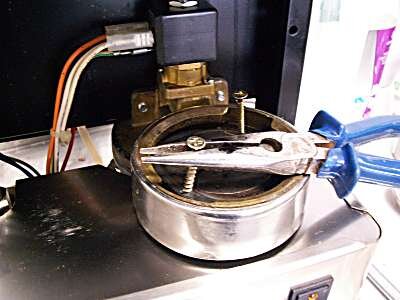
SOLENOID VALVE REPAIR
When to do it?
When the solenoid valve leaks during brewing, usually accompanied by a "pipe hammering" effect. (Cleaning required.)
When water will flow from the steam wand, but not the group.(Coil replacement.)
Parts needed:
O-Rings (rare),
Solenoid coil.
Very rarely a whole new assembly is needed.

Undo the two screws and slide the front panel out to the right.
This gives you complete access to the solenoid valve assembly.

Undo the spout, then the coil retaining nut.

At this point the coil can be removed by simply pulling it down off the valve shaft.
If it needs replacement, it's a simple matter to pull the existing electrical wires off the old coil and attach them to the new one, one at a time.

If the problem is grit in the valve, it can be unscrewed at this point and removed for cleaning.

The slug and spring come out for cleaning. They will only fit back in one way, making reassembly easy.

If there is a problem further upstream in the valve, the rest of the body can be removed by undoing 2 hex nuts (in older models, flat head screws) and removing it from the group assembly.
SPARE PARTS
Coffeeparts has a complete parts list for Silvia repairs and maintenance. This is where we buy them.
TIPS

Teflon pipes are fragile and easily damaged by pliers or grips.
Using a scouring pad or piece of fine sandpaper will allow you to get a firm grip for either pulling or pushing, depending on the type of fitting involved.
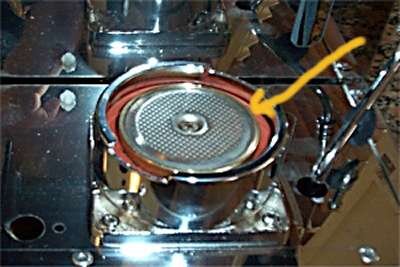
Removing stuck showerscreens can be a pain, but removal can be helped by using a hammer and flat head screwdriver at the edge of the screen to "chisel" it in the anticlockwise direction.
When the screen begins to rotate you should be able to undo the screw.

Sometimes the showerscreen is so dirty no amount of detergent or scrubbing will clean it. Heating it to red hot over a gas flame burns away the crud clogging the holes quickly and effectively.
The quickest way to remove old group gaskets from any machine is to screw a couple of self tapping woodscrews into them and pull the screws out with pliers.
Even if the gasket comes out in chunks it gives you a chance to chisel out the rest.